|
Like many sports, baseball puts asymmetrical loads on the body. In all aspects of baseball (pitching, fielding, batting, base running) the rules of the game and right or left hand dominance influence how the body takes on the physical stress of the sport.
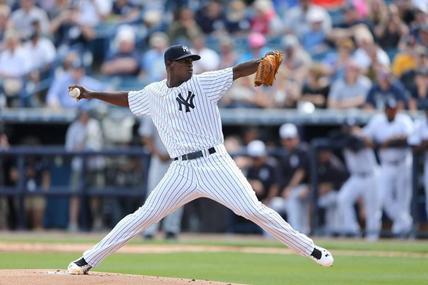
The core is essential for generating and transferring force during the powerful and asymmetrical movements that take place in baseball. For the purpose of this discussion we are going to define the core as: the abdominals, the erectors (muscles that run parallel to the spine), the pelvic floor, and the hips (the glutes, groin muscles, and hip flexor muscles). When throwing a pitch, the core muscles maintain stability of the the low back and hips allowing force generated through the legs to be transferred through the core to shoulder complex and ultimately to the ball. This transfer of force takes place in less than 0.2 seconds!1 The core is essential to maintaining proper mechanics through all phases of delivering a pitch. Any imbalances in flexibility, strength, or coordination at that high rate of speed can lead to decreased performance and injury. If we focus specifically at the hips as a key point connecting the powerful leg muscles to the core we find a potential area for injury and dysfunction in the pitching athlete. Up to 5% of all injuries in minor and major leaguers are due to hip problems.2 Although difficult to estimate, it could be hypothesized that other injuries to the shoulder or elbow might be avoided if function is maximized at the hip and core. Let’s forget about the steroid era in baseball for a moment and recall the crazy workouts of Roger Clemens. Sure, he focused on strengthening his arm and rotator cuff, but the main focus of his off-season training was strengthening his hips and core. When a hip injury in a baseball athlete does occur, physical therapy is generally the best way to treat it. The treatment of hip injuries in pitchers begins with a detailed assessment and evaluation. This includes looking at spine and hip range of motion, flexibility, soft tissue quality, strength, endurance and pitching mechanics. Treatment for these types of injuries is highly individualized depending on the specific presentation of each athlete. The four main elements we focus on when treating hip pain in a pitcher include: manual therapy, hip mobility, core stability and pitching mechanics. Let’s break each of these down: 1 - Manual therapy - This includes mobilization, manipulation, or muscle energy techniques to the hip and/or low back and pelvis complex to restore normal mobility, decrease pain, and improve muscle performance. Manual treatment can also include instrument assisted soft tissue mobilization and soft tissue techniques to relax spastic muscles, improve soft tissue mobility, and restore muscle flexibility. 2 - Hip Mobility - These are drills and exercises to restore full range of motion and flexibility to the hips. Some examples include adductor stretching, hip flexor stretching, and deep lunges for an active stretch to the hip flexors. 3 - Core Stability - These exercises are used to maintain integrity of the low back and pelvis complex and can include double and single leg bridges, glute activation drills, lunges, planks, crawling, ab roll outs, and single leg balance and stability exercises. 4 - Pitching Mechanics - Breaking down the pitching delivery step by step and practicing proper mechanics that build on the range of motion, mobility, and stability gained in the first three elements through a focused rehabilitation program. Recently at Performance Physical Therapy we had a patient who is a left handed pitcher with hip pain. He presented with complaints of a right hip pain that bothered him the most during his stride to deliver the ball to the plate. His history revealed no trauma or recollection of injury-just an onset of pain with throwing. On examination, serious hip pathology was ruled out through a detailed history and an in-depth orthopedic exam. There was significant tenderness to the touch over the hip flexor muscle and its attachment to the front of the hip bone, pain with stretch to the hip flexor muscle, and pain that was reproduced with contraction of the hip flexor. We also identified limited flexibility of the groin and hamstring muscle groups and weakness of the hip, glute and core. To treat this patient we utilized manual therapy targeting the low back and pelvis, hip joint and hip flexor muscles, hip mobility exercises, core stability work, and a review of his pitching mechanics. With only a few sessions of physical therapy and some activity modification, our patient did not miss a single day of baseball practice or strength training with Challenger Strength and made a full return to pitching in less than 2 weeks. Early identification of the injury and a smart selection of treatment techniques was the key to such a quick recovery. Be on the lookout for a post from Gerry DeFilippo at Challenger Strength next week demonstrating some great ways to further develop core, rotational strength and power that helps prevent hip injuries and improve performance! Interested in what what we do and how we achieve our results? Stop by one of our two locations in Wayne, give us a call at 973.368.4907, email us at [email protected] or follow us on social media to see how we can help you! Dr. Anthony Falco References: 1 - Seroyer ST, Nho SJ, Bach BR, Bush-Joseph CA, Nicholson GP, Romeo AA. The kinetic chain in overhand pitching: its potential role for performance enhancement and injury prevention. Sports Health. 2010 Mar;2(2):135-46. 2 - Coleman SH, Mayer SW, Tyson JJ, Pollack KM, Curriero FC. The Epidemiology of Hip and Groin Injuries in Professional Baseball Players. Am J Orthop (Belle Mead NJ). 2016 Mar-Apr;45(3):168-75.
1 Comment
Long distance running and long duration high intensity cardio have long been a staple in team-sport training and preparation. I am talking since before the days where Rocky Balboa through on on his grey sweat suit and ran up those historic stairs in Philadelphia. Like anything, times change and so must the way we prepare and train athletes. I am writing this mostly because I am concerned and because it is time to make a statement. I have seen too many injuries to the lower extremities of young athletes who are also left tired and abused from improper conditioning. So here is my final stand. I am going to make this quite simple. I will break down the different energy systems of the body, discuss which are used prevalently in sports and then finish up with my favorite ways to train team-sport athletes when it comes to conditioning.
The Energy Systems of The Human Body As Humans we arrange activity into three basic categories of energy, which are alactic (anaerobic), lactic and aerobic. Here is a breakdown of each of them and when they are used.
Systems Most Commonly Used In Team Sports Essentially all major team sports are performed in the alactic (anerobic) and aerobic energy systems. That is, rarely does a team sport athlete exert themselves at maximum intensity for longer than 15 seconds (intense and short sprints, jumps, force production or shots) . If they are continuously active it will be at lower intensities (think basketball players jogging around in a half-court set, soccer/hockey players passing a ball/puck amongst teammates etc.). That is, a team sport athlete will rarely ever perform their sport in a lactic state (higher intensities for continuous durations). So, you can begin to see why it would be pointless to train in this manner. The Wrong Way To Train Team Sport Athletes (Along With My Alternatives) I’ll keep the first part of this brief. In a nutshell, it is wrong to train athletes at higher intensities for long periods of time. This can include multiple mile runs, long sprints etc. Now, here are my favorite ways to train the alactic/anaerobic and aerobic systems. Note that a combination of both in a program is most effective.
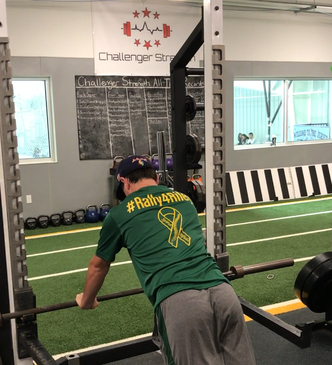
As you can see it is quite simple to understand why the conditioning practices that are still seen today are wrong and detrimental to athletes. It is imperative that we assess the sports being trained for so that we best understand the structure and needs that go along with it in terms of anaerobic and aerobic training. In the past I have talked about some general tips to use in order to grow a strong and big upper back. (http://www.challengerstrength.com/blog/tips-and-five-best-exercises-to-build-a-big-and-strong-upper-back). I have also given you some of my favorite exercises for the upper back and how to develop it. This got me to thinking and I realized that not many coaches and athletes know how much of an importance should be placed on the role of the upper back when programming pressing movements for baseball players. Many people neglect the involvement of the scapulae (shoulder blades) in their pressing variations, and fail to see how much they can develop this aspect of their body if they simply focused on a few key details. This would provide a multitude of benefits for athletes as their upper back plays a huge role in their health and performance. For baseball players and rotational athletes (hockey, lacrosse, golf etc.) the upper back plays a huge roll in not only their swing or shot, but it can also limit shoulder injuries if trained effectively. A strong upper back can help improve posture and limit the internal rotation of the shoulder (internal rotation can lead to labrum injuries due to the compression and force constantly placed on the acromioclavicular (AC) joint). So, not only can we contribute to an aesthetically pleasing upper back by making some adjustments in our pressing, but we can also limit injury and contribute to increases in performance for baseball players. Here is a quick breakdown of external rotation, how to promote use of the scapulae for presses with baseball players and my favorite exercise variations to do so!
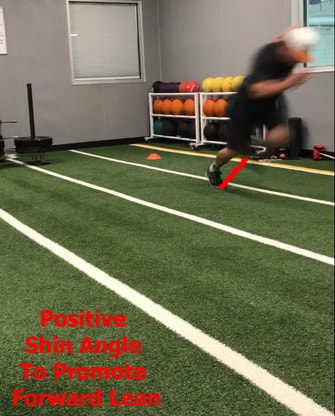
External Rotation In my opinion the best analogy to use to explain external rotation of the shoulders would be to have someone imagine that their arms are outstretched and fully extended with their hands on a wall. On that wall is a big sheet of paper, and your goal is to tear the paper down the middle without moving your hands. How exactly do we do that? Well, think as if you are trying to “screw” your hands into the wall, only without moving your hands outwards. External rotation is created when we drive our right hand clockwise and our left hand counterclockwise. If we do this without actually moving our hands then we create torque, and that imaginary paper is now torn! The shoulder is a ball and socket joint, meaning that the humeral head rotates about inside the cup like socket of the shoulder blade. When we create proper torque the humeral rotates outward, hence “external rotation.” Now I know you are all saying “Great Gerry please explain how this applies to my training.” Well, basically many of us perform presses without external rotation, which not only leaves us susceptible to injury, but also does not allow us to develop the upper back and shoulder blades to the best of their ability. This has been said many times before, yet I still see baseball players utilizing presses that do not let the upper back work freely and independently of a bench. This is due to a number of factors, which include hand and grip positioning and the side effects of performing presses on a bench. Basically, when our back is on a bench the bench itself does not allow for full scapula activation and retraction, which can limit external rotation and use of the upper back. Experienced lifters know how to properly activate the upper back and can get around this, but many others struggle. Lastly, bilateral movements (presses with two hands) can negate the need to isolate each individual shoulder blade due to the fact that using both hands does not require as much stabilization as unilateral movements. With that being said, here are a few variations that make use of these fundamental principles. Dumbbell Piston Press As I mentioned above, unilateral presses allow the shoulder blades to work independently of each other. In addition, they require more external rotation to be created in order to stabilize fully. If I have a baseball player perform a bench press it will be with dumbbells due to the fact that they require more focused stabilization of the scapulae then barbell presses, and allow for a neutral grip to prevent stress on the shoulders. However, an even better way to guarantee shoulder blade activation and external rotation is to perform dumbbell presses in a piston like manner. That is, perform each press individually (one side at a time) so that the athlete has to pay attention to activating the upper back and externally rotating at the shoulder in order to properly stabilize the weight. I will also utilize these presses at lower weights for dynamic/speed repetitions as well for power development. Barbell Push-Up The barbell push-up not only is a great tool to use in order to teach the art of pressing, but also it eliminates the use of the bench (as I mentioned), which can teach an athlete how to cue and activate the upper back while letting the upper back work independently. Since we are performing presses without the support of the bench we can fully retract the shoulder blades with each repetition and learn how to activate the upper back. This is a simple movement for advanced athletes, so I will usually implement slower movements, isometric holds and even increase the load (with chains) in order to progress the movement and make it more challenging. Any type of push-up variation is great to use for baseball players. Cable or Band Presses Similarly to push-up variations, cable and/or band presses allow the athlete to perform pushes that allow the scapulae to work independently of one another. They also help place less stress on the shoulders. Bottoms-Up Kettle Bell Presses This last variation is the most advanced and ties in all the principles I have previously mentioned. Firstly, holding the kettle bells in a bottoms-up position makes external rotation a necessity, and is why I love this variation. If you do not properly externally rotate it is almost impossible to stabilize the kettle bell. In addition, we are once again removing the bench from the equation and requiring true activation of the upper back and retraction (pinching) of the shoulder blades. Lastly, if you really want to advance this variation and take it to the next level you can perform the presses unilaterally (one hand at a time), and tie in the same principles you would be when performing the dumbbell bench press in a piston manner! As I become more involved with strength and speed training with baseball players it is increasingly obvious that the 60-yard dash is a bad metric to use to test “true baseball speed.” I put true baseball speed in quotes because once we step back and evaluate the sport we will realize the unique aspects of the sport that define what good speed truly is. That’s the thing here. Each sport has different components that help us find ways to effectively train speed in the most efficient manner possible. So, in order to attack this topic effectively I will first break down the two phases of a sprint (acceleration and top speed), the nature of the 60-yard dash, sports specific speed to baseball (that is, what actually happens in a game) and lastly my suggestion for a better test for linear baseball speed.
The Two Phases of A Sprint Let’s cut to the chase here. Essentially, a linear sprint is made up of two phases.
The Nature of The 60-Yard Dash Now that we understand the phases of the sprint we can begin to discuss what is present during the 60-yard dash. Essentially, only twenty-five percent of the 60-yard dash is spent on acceleration (15 out of 60 yards). This means that 75% (45 of 60 yards) is spent in the top speed phase. Keep this in mind as we move forward. Baseball Sport Specific Speed This is the part of the article where I dissect the involvement of linear speed in the game of baseball. For ease of understanding here I will break this down in three phases: home to first after contact, base running and lastly defensively (particularly in outfielders).
My Suggestion For A New Test For Baseball Speed As you can guess, my suggestion for the test of linear baseball speed would be the 20-yard dash. In my opinion the 20-yard is more effective due to the fact that more of baseball is spent in acceleration than top speed. Gauging a baseball player’s speed with a test that is mostly spent in top speed when they mostly play the sport in acceleration is inaccurate. |
AuthorSGerry DeFilippo: ISSA CPT- CPPS, AAPS. Founder/Owner: Challenger Strength. Archives
October 2020
Categories
All
|


 RSS Feed