 In-season training is one of the most misunderstood aspects of athlete development. Usually there are two sides of the coin when it comes to the mishandling of how to go about continuing progress during the season. The first group of athletes and coaches simply stop training all together or are afraid to continue any type of intense training. The other group of athletes and coaches never take their foot off the gas and end up wearing themselves down, which ultimately can stunt development and progress, hurt in-game performance or even lead to injury. Proper in-season training can go a long way in furthering development that was achieved during the off-season and preserving gains made over the course of the prior six months of training. It can also help prevent injuries and improve on-field performance! When it comes to in-season training you can vastly improve the effectiveness of your programming by understanding submaximal maintenance training and flexibility with your programming, the use of concentric only exercises and using high repetitions to promote much needed recovery!
Submaximal Training and Programming Flexibility Before you begin to understand submaximal training you must first grasp the basic fundamentals of programming flexibility. Essentially, you need to have a good feel for your body and be mindful of your in-season schedule in order to adapt your program to fit your needs. For example, you may find that weather may change your game schedule during a baseball season. You must have options of varying intensities in your programming so that you can properly adjust. If you are feeling good and have an easier week of games (for any reason), you can increase the intensity of your training so that you can still make some gains and further your development. Remember, just because you are in-season does not mean you cannot further improve on attributes you gained in the off-season. With that being said, here is a quick breakdown of a method you can use to approach your loads and intensities while you are aiming to maintain, and then how you can have some flexibility in light of opportunities to up the intensity to off-season levels. I normally keep my athletes in the 70-90/95% range of their one rep max (1RM), while they are in-season. Essentially, the only time they will work towards 90/95% of their off-season 1RM is if they are only performing one-repetition sets. I feel that the 70-85% range coupled with anywhere from 2-5 repetitions is a perfect place to maintain (and even gain) strength. Once you have this is mind it is easy to see how you can be flexible in adjusting your volume and load percentages. For example, let’s take a high school baseball player who is performing two “in-season,” training day’s per-week. This athlete’s primary lower body movement is the squat, and he maxed out at 265 pounds at the end of the off-season. Let’s create a sample situation where the general program called for three repetition sets of 80% of his 1RM, but he had an easy week due to miscellaneous cancellations and scheduling complications. An adjustment to that set program would look as follows:
You can see how easy it is to adjust your intensity to take advantage of lighter weeks you may get throughout the season! Take advantage of these opportunities and adjust! Making The Most of a Prowler Sled (Concentric only exercises) I will keep this short and sweet (I promise I will try). Muscle fibers predominantly tear during eccentric portions of a range of motion. That is, the lowering of the weight where you are controlling a load or resistance is what promotes muscle fiber tears and hypertrophy. With that in mind, concentric (part of the range of motion where you are moving into extension like the pressing in a bench press or upward movement in a squat) only movements are a great way to preserve strength, but limit eccentric stresses that can cause soreness. This is key when we are in the thick of a season and we do not want to place extra stresses on our muscles. In addition, concentric only movements help us maintain much of the strength we built in the off-season. In light of this, the prowler sled is your best friend. Almost all activities done with a sled do not incorporate an eccentric load on the body. Sled pushes work your legs, but only through extension, sled rows do the same and just about any other variation can be thought of in order to preserve strength and limit muscular soreness. Using High Repetitions to Promote Recovery Lastly, I will generally make one of my suggested two-day in-season training days repetition based. Higher repetition sets at lower intensities (think of a 15 rep set with a weight you could do for 30 reps) are great to promote blood flow and recovery for an in-season athlete who may very well need this. A great way to treat recovery based repetition lifts is to perform them in a 65-75% intensity (window for aerobic recovery). In addition you can also treat the higher repetition based lifts with the same mentality as your heavier day. IT IS OK to push it just a bit if you are feeling great and have a lighter schedule that week. Go ahead and use these tools to ensure that your in-season training is effective and even result yielding as tool to send you into the next off-season with a head start on your competition!
1 Comment
 Over the past couple of months I have made great use of yielding isometrics in my programming for my athletes. In doing so, I have developed some great strategies (in my opinion) on how to utilize these particular movements as accessories in your programming that can help pack on some much desired muscle (along with some strength)! Here is a quick and easy to understand breakdown of yielding isometrics along with some practical ways to implement them in your programming.
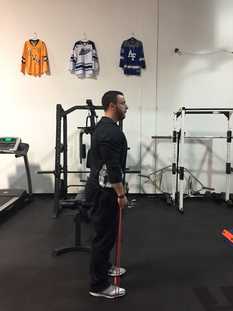
What are Yielding Isometrics? So already in this article I have mentioned that yielding isometrics are a great tool to use to build muscle mass. With that being said, this gives us a great clue as to what is occurring during yielding isometrics that helps build muscle mass. As many of us know, a major component involved in the creation of muscle mass is the tearing of muscle fibers (myofibril hypertrophy). During myofibril hypertrophy contractile proteins also increase so you will also see some strength gains as well! This differs from sarcoplasmic hypertrophy (the result of high repetition bodybuilding style sets) in which non-contractile fluid, sarcoplasm, increases in volume. This is the “pump,” effect many bodybuilders refer to and is also the reason you can be massive and not have strength relative to your size! Now, what sounds more appealing to an athlete? Functional muscle mass that correlates to strength gains or “show,” muscle that does not actually provide much of a performance benefit? Assuming that you want functional muscle mass, Yielding Isometrics are for you. Essentially, yielding isometrics involve resisting forces that are trying to pull you back through the range of motion you are performing. For example, the banded terminal knee extension exercise being performed here. The athlete moves through the full range of motion and then attempts to hold that position as the band is trying to pull him back through. Basically, you are resisting eccentric forces (remember that eccentrics cause muscle fiber tearing), and thus working myofibril hypertrophy. How to Implement Yielding Isometrics Before I delve into specifics on how you can pair these with certain exercises in your programming, here is one basic principal I like to use with yielding isometrics. I stick to general principles of hypertrophy and aim to keep time under tension (total amount of time a muscle is contracted during a set) to 30-50 seconds. You can begin with 30 seconds and gradually work your way up to 50 as you progress through your program. My two favorite ways to implement Yielding isometrics in my programming thus far are as a second exercise in a superset that targets the same muscle groups as the first exercise or as the second exercise in a superset to accompany a concentric only movement.
Now that you understand yielding isometrics you can utilize them and maximize the efficiency and effectiveness of your programming! Give them a try and notice immediate gains in muscle mass as well as strength!  Last week, Dr. Anthony Falco discussed the basics of heart rate training and how to properly calculate your resting heart rate and maximum heart rate. Once you determine these numbers you can properly utilize heart rate monitors to enhance your training. In athletes, this can be tremendously useful, as it will allow them to better determine if their aerobic training is focused on recovery, maintenance, or aerobic improvement. For the sake of this article, we will be focusing on aerobic improvement. To improve an athlete’s aerobic capacity you must understand the percentage of maximum heart rate needed to reach the improvement threshold and also how to use exercises which best work towards achieving that same goal. Proper Heart Rate Percentage For Aerobic Improvement In the past I discussed using the aerobic capacity system to help aide in recovery for athletes. For recovery, it is best to work in a 60-75% range of the athlete’s max heart rate. However, the range for aerobic improvement goes as high as 85-90% of the max heart rate. Basically, apply Dr. Falco’s formula for your maximum heart to these percentages and you can find the best threshold for an athlete to work in to improve aerobic capacity. For example:
How To Construct A Proper Movement Pattern Aerobic Program As I previously mentioned, the movement patterns are great to use for aerobic improvement for a number of reasons. In addition to helping improve an athlete’s working capacity, you can also use this as extra time to drill home proper form with the main movements. However, it is extremely important to note that an athlete must show proficiency in these movements prior to using them, as it is never ideal to learn a new skill or movement in a fatigued state. For example, an athlete who cannot perform a proper bodyweight squat should not be allowed to use this movement in an aerobic circuit as they will be susceptible to not only injury, but can further program their nervous system to perform the movement incorrectly.
The most important thing to remember here is that you can find success with a multitude of different methods. Once you have determined your proper heart rate the main goal is simply stay in that zone and maximize your aerobic capacity. Movement pattern circuits are simply a great alternative to use because they can further solidify the proper form and technique of the most important qualities and movements for an athlete. Gerry DeFilippo 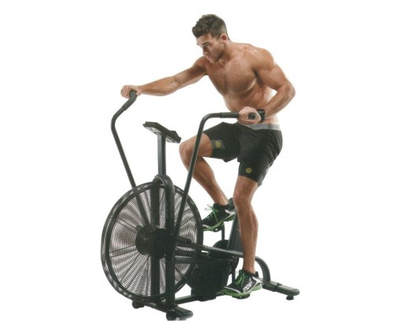 Last week, Dr. Anthony Falco discussed how you can decipher the differences between pain and soreness, and when it may be appropriate to see a physician. This week I want to give some strategies that can be used in order to deal with muscle soreness and promote recovery after high intensity bouts of physical activity. Essentially, you now know you do not need to see a physician, so what is next? Once I give you a full breakdown of what makes cardio recovery focused I will give some methods you can use in your own programming.
The Different Energy Systems of The Body Essentially, there are three main energy systems:
For the sake of this discussion we are going to focus on the aerobic (oxidative) energy system as a means of promoting recovery. While the aerobic energy system is utilized to promote recovery between bouts of anaerobic (alactic) activity, we are going to focus on its role in recovery and assistance in dealing with soreness/fatigue. With this being said, it is essential to perform training in a range of 60-75% of your max heart rate (220-age). This range will ensure you are aiming to stimulate the recovery process. How To Perform Aerobic Recovery Training As I mentioned, it is imperative to ensure that you are performing lower intensity bouts that have longer durations when trying to recover. This can be done in a multitude of ways.
The important thing to remember when utilizing the aerobic energy system for recovery is to be cognizant of the intensities. Recovery can only occur if the work being performed is done in a 60-75% window of intensity.  Whether you are starting on a new exercise program or if you are someone who exercises regularly, it is important to understand the difference between soreness and pain. Similarly, athletes who are competing need to know when their muscles are sore due to the exertion of their sport or when they are dealing with pain that needs further attention.
When exercising, we put our body under physical stress. This physical stress breaks down our muscles and tissues. By adapting and recovering from this breakdown we get stronger and are then able to take on more physical stress. For example, if I regularly walk a mile in 15 minutes 3 times per week, over time it will get easier for me to complete the mile in 15 minutes. After a few weeks of adaptation and recovery from this amount of exercise I may then be able to walk a mile in 13 minutes. If I continue to challenge myself I can continue to improve by walking a mile in a shorter period of time. This holds true for aerobic exercise (walking, biking, running, etc) and strengthening exercises (lifting weights, bodyweight exercises, etc) The process of muscle breakdown due to the stress of exercise is what makes us sore after a workout. After a workout that includes squats and lunges our legs and hips may be sore for a few days. This is a normal part of exercise and we call this soreness DOMS, or Delayed Onset Muscle Soreness. This soreness in the muscles is a sign that we have stressed our body and will generally subside in a few days or with a light recovery workout (something less stressful). Pain is different. Pain can occur in the muscles or the joints and may not subside after a few days like DOMS will. Pain generally will not feel better with a recovery workout like a light jog or bike ride. If the feeling of pain does not subside with rest within about a week it is then a good idea to call your physical therapist or medical provider. Often when pain is addressed early it is easier to get back to the activities you enjoy without pain more quickly. Below is a table that can serve as a quick reference to better understand the difference between soreness and pain. Soreness vs Pain Soreness Pain Type of Discomfort Soreness: Tender when touching muscles, tired or burning feeling while exercising, minimal dull, tight and achy feeling at rest Pain: Ache, sharp pain at rest or when exercising. Pain with movement. Onset Soreness: During exercise or 24-72 hours after activity (Delayed Onset Muscle Soreness) Pain: During exercise or within 24 hours of activity Duration Soreness: 2-3 days (can be longer) Pain: May linger if not addressed Location Soreness: Muscles Pain: Muscles or Joints Improves with: Soreness: Stretching, following movement Pain: Ice, rest Worse with: Soreness: Sitting still Pain: Continued activity Appropriate Action: Soreness: Resume offending activity once soreness subsides Pain: Consult with medical professional if pain is extreme or lasts >1-2 weeks Source: adapted from http://www.moveforwardpt.com/resources/detail/soreness-vs-pain-whats-difference Not sure if you are dealing with muscle soreness or pain? Or do you have questions about beginning or how to progress your physical activity/exercise program? Our physical therapists can help you by recovering from any aches or pains you may be experiencing and helping design a plan to return to your desired activities. Check out our website or give us a call to schedule an appointment and get back to the activities you enjoy pain free. Our 15 Corporate Drive and 2025 Hamburg Turnpike locations in Wayne are open Monday through Friday. Next week Gerry DeFilippo will outline some of his favorite strategies to address DOMS when he is working with his clients and athletes. Dr. Anthony Falco 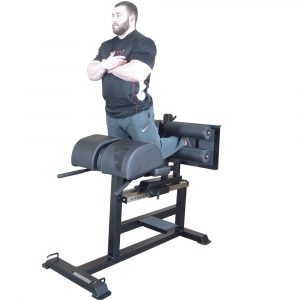 In the next installment of our supplemental and accessory exercise series I give some insight into my favorite posterior chain activating accessory exercises that can contribute into improvements with the hinge movement pattern.
Main Areas Involved In The Hinge/Deadlift The posterior chain (glutes, hamstrings, external rotators etc.) is the main mover of the hinge movement pattern. Thus, it is important to implement accessory exercises into your program that target these muscles. While supplemental exercises for the hinge almost always include the movement itself, the accessory exercises do not have to. Thus, I included the straight leg deadlift (or RDL) in my favorite supplemental exercises, but none of my accessories will be performed with the same pattern or in the same plane of motion as an actual deadlift. Hip Thrusts There are a couple reasons why I love hip thrusts. First and foremost they are great because they can be done with multiple types of equipment and as a result can be a staple in any program. Bands, dumbbells, barbells, medicine balls and plates can all be used to perform hip thrusts. The second reason I love them is because they allow you to get a great feel for finishing your hinge. Essentially, cuing a squeezing of the glutes at the top of a hip thrust not only provides hypertrophic benefits, but also can teach athletes and lifters to drive their hinge all the way through with their glutes instead of hyperextending at their lumber spine. Glute Hamstring Raises I enjoy glute hamstring raises because they are essentially fool proof in terms of requiring posterior chain activation. Basically, in order to be able to do them you need to fully contract your hamstrings and glutes. Other accessory exercises may require a mastery of the movement in order to fully engage the posterior chain, but glute hamstring raises do not. Furthermore, glute hamstring raises also can be utilized to rid of lumbar hyperextension throughout the completion of a hinge. 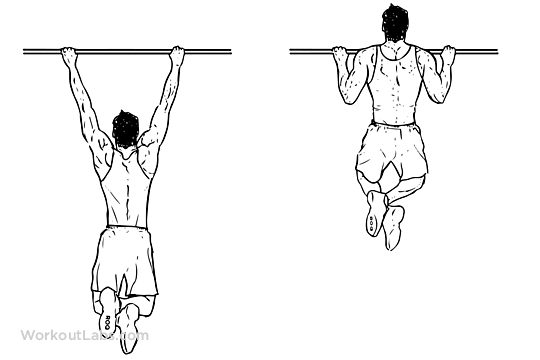 In article five of our supplemental and accessory exercise series we discuss the pull. While the other articles thus far in this series have focused on particular exercises to improve a specific movement pattern, this article will talk more about strategies to implore in order to perfect the pull-up. With my experience it is fairly easy to master rowing movements (both unilateral and bilateral i.e. dumbbell and barbell rowing), but not many people are aware of how to take someone who can do zero pull-ups, and build them into being able to do a pull-up with perfect form. So, the remainder of this article will discuss several ways to manipulate the movement in order to become stronger throughout the range of motion, and then I will give you my favorite exercise to use as a precursor to “graduating” to pull-ups.
The Magic That Is Eccentrics and Isometrics To start, I will clear up what both eccentrics and isometrics are to any first time readers. In extremely basic terms, the eccentric portion of the range of motion is the “negative,” or lowering of the movement, and isometric refers to any hold or pause throughout the range of motion. Essentially, we are strongest eccentrically, which is why performing movements eccentrically that we are not strong enough for to perform a full range of motion with is a great way to build muscle and control with a movement. Isometrics are also a great way to improve dynamic motor control (stability throughout a full range of motion) and increase time under tension (time the muscle is contracted), which can lead to muscle growth.
Inverted Bodyweight Rows Now that we have covered eccentrics and isometrics I want to discuss my favorite exercise to use before you progress to working on the pull-up bar. The inverted bodyweight row is a pull-up done from the barbell, which is suspended on the squat rack pins in the bench press position. You hang from the bar and perform a pull-up up to the bar. Not only can you implement eccentric and isometric work with this movement but also you can raise and lower the bar to place you at a higher angle (easier) or a lower angle (more challenging). I love starting beginners at a high angle with these and progressing through the movement and slowly lowering the angle while introducing longer eccentric and isometric holds. Once you show proficiency in this movement you can proceed to working from the pull-up bar. Building Your Program With Supplemental and Accessory ExerciseS (Week 1 of An 11 Week Series)4/27/2017 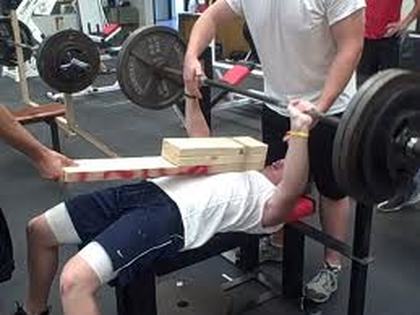 In terms of programming, one of the main components of building an ideal program comes from a sound and consistent template. Over the next 11 weeks I will be breaking down two tremendously important aspects of a training program, which are supplemental and accessory lifts. Basically, there are five fundamental movement patterns that are almost always involved in our training.
They are as follows:
Each of these movements can be improved upon via supplemental and accessory lifts. Essentially, supplemental lifts are of the same type of pattern as the primary movement pattern and help build that movement pattern directly. Think of it in the sense of a training family tree. The fundamental movement patterns are the ancestors of the family. Each movement pattern then branches off into supplemental exercises, and from those supplemental exercises come a multitude of accessory exercises. Accessories are more specific and target particular muscle groups to strengthen the supplemental and then back up to the fundamental movements. Breaking Down an Effective Training Program Now that I have shed some light on supplemental and accessory exercises, I would like to briefly detail a skeleton or template of these exercises and how they should be utilized for performance benefits. You will see that this is a fairly simple concept and it can be used and repeated for all of the fundamental movement patterns. In addition, having a template allows us to collect a database of exercises for each category and as a result we can keep our training fresh by utilizing different variations for similar effects. The template breaks down as follows:
What To Expect Moving Forward Over the next ten weeks I will write separate articles for my favorite supplemental exercises for each of the fundamental movement patterns. Once I am through with that, I will do the same with accessories. That is a total of 10 articles, two pertaining to each movement pattern. At the conclusion of this comprehensive breakdown you will be able to use this template I provided and utilize my favorite exercises. 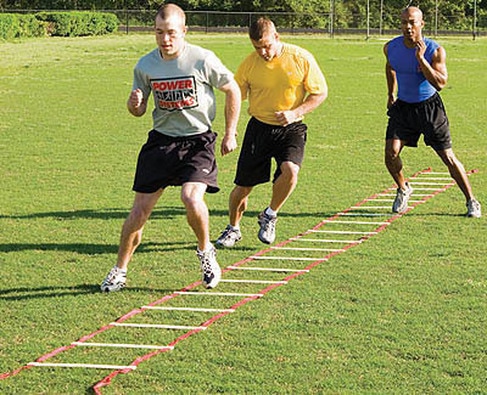 I am here for one reason and one reason only. This article has been inspired by the countless time my athletes have asked me if we are “going to do ladders.” This would usually be followed up by a fifteen minute rant where I would rattle off multiple reasons why ladders are the worst thing you can do for speed training. Essentially, mentioning ladders in the same breath as speed training and agility is the biggest crime in athletic performance training today. It is an epidemic. Go on social media and you’ll see a pro athlete posting a video of their lightening “quick feet,” and their coach proclaiming how much faster they have gotten. Do yourself a favor and read this and pass it on. It will explain why I do not have ladders in my gym and might add a few more years onto my life, as I will be less likely to have an aneurism from people asking me why I do not like speed ladders!
Sports Are Not Linear We can start here right off the bat. Sports are not pre-determined. Meaning, an outfielder in baseball is never going to take the exact same route to a ball as they did the play before, and a football running back is never going to maneuver in the exact same manner to evade a defender. The list can go on and on, but you get the point. This is where my first problem occurs. Ladder and pre-determined cone drills aimed to improve agility are formulaic and repetitive. If anything, an athlete is simply becoming more proficient in a practiced and rehearsed pattern than they are becoming more agile. Agility is the ability to react visually and cognitively to stimuli and adjust as quickly as possible. A running back sees a linebacker cut across the field to tackle him and he cuts back (agility), a shortstop processes that a ball has been hit to his left and there is a runner on third so he must act in a certain manner (cognitive reaction and agility). Again, the list could go on and on. In what way does a rehearsed ladder or cone pattern do anything to prepare an athlete for visual, audible or cognitive reactions? Hint, they do not! Small Choppy Steps Are Detrimental To Linear Speed My next point is fairly cut and dry as well. I see numerous coaches with a video of an athlete performing a “speed” ladder routine and proclaiming they are working on increasing their speed. Let us take a quick second here and explain some fundamental running principles. We are faster (this may be a reality check to some of you), when we take longer and less strides to get from point A to point B. If you don’t believe me here is some hard data. Aside from the fact that I have a particular athlete (who cut off .2 seconds from his 60 yard dash time in four months), who’s direct speed increases coincided with reducing his strides to cover the first 10-yards of his sprint (from 7 strides to just over 5.5), I will share some cold hard facts from the best sprinter this world has ever seen. That’s right, Usain freakin’ Bolt. Remember in the 2012 Olympics when he was absolutely obliterating the competition and shattering records with his shoes untied? You do? Great. Guess what? THE MAN RAN 4.5 LESS STRIDES THAN EVERY OTHER COMPETITOR. So, while you have your small hurdles and ladders and can brag about how “lightening fast,” you or your athletes feet are, you are not improving linear speed! What Is Agility and How Do We Actually Improve It? As I mentioned earlier, one half of the equation in terms of agility is being adept and well equipped to react to visual and cognitive stimuli. The other half of the equation is eccentric strength (ability to slow down and stop), and starting strength (think coming out of the hole in a squat). Consider this. That same running back we discussed hits the hole hard to the left, and then has to juke right to evade a linebacker. The stronger he is eccentrically the faster he can slow down and stop, and then redirect (starting strength) into the other direction. That is agility! Ladders and coaching “quick feet,” through these ladders accomplishes nothing. Cone drills only cover half of this equation. They practice and improve “starting and stopping” ability but do nothing to account for the non-linear nature of sports. How To Improve Agility:
Acceptable Uses For Ladder Training There are some acceptable uses for ladders. I sometimes will make use of them for a warm-up or even use them for conditioning. The bottom line is that they do not improve linear speed nor do they work on agility. If you want to argue that they can work on footwork for certain sports (for example a wide receiver in football) where certain quick and choppy steps are rehearsed, then fine. However, I tend to leave those things to the actual coaches and stick to improving aspects of sports performance that coincide with strength training.
There is an ongoing debate in the world of strength training regarding static stretching and when and how it should be implemented into programming. I am going to keep this short and sweet, but at the same time I would like to dispel any fear athletes and gym goers have about static stretching in their warm-ups. Here are two common warnings about the negative “side-effects,” of static stretches and their adverse impact on performance:
Here is the thing though, these two notions are absolutely true and I do not disagree with them whatsoever! Now I know you may be reading this and you are probably thinking to yourself “Why on Earth is this guy agreeing with these things when he already stated the purpose of the article is to rid me of fear of static stretching?” You know what, you are right? I agree with these facts, but I strongly disagree with the fact that you cannot static stretch before you train, and here is the reason why! Basically, what these trainers are failing to shed light on is the fact that static stretching is only advised against pre-training if it is not appropriately utilized! Let me explain. Why They Are Ok Please go back and check out my recent article on how to conduct a proper warm-up (http://www.challengerstrength.com/blog/how-to-properly-warm-up-athletes-meatheads-and-everyone-in-between). If you notice, I have a strategic warm-up scheme (in order of when each should be executed I might add), and at the top of the list is foam rolling (also known as SMR or self-myofascial release) and static stretching. Now, why would I do this if I were going to sit here and claim to be an educated and knowledgeable trainer and coach? If everyone out there claims they are bad for you then they must be. Wrong! As long as you follow specific guidelines following static stretching you will be perfectly fine, and actually benefit from the static stretching. Simply put, if static stretches are followed up with activation exercises, movement pattern rehearsal and central nervous system activation (I have also written another article on my three favorite CNS activating exercises) (http://www.challengerstrength.com/blog/three-favorite-nervous-system-activating-exercises), they are fine! You will not have to worry about lowering the responsiveness of your central nervous system and relaxing your muscles if you work towards igniting them anyway! Also, you can work out any problem areas you may have, improve your short-term range of motion and promote much more effective movement with your compound lifts When They Are Ok Obviously I just spend a paragraph explaining that they are ok before a training session, but I will also clarify that they are equally (or even more important) post-training. Static stretching post training is a great way to down regulate the nervous system. Basically, we can use SMR, stretching and breathing drills in order to cue our body into a mode of recovery. Not only that, but longer holds in the 20-30 second range have shown to promote long-term improvements in ranges of motion. How To Static Stretch As a general rule of thumb, I keep pre-training static stretching as limited to 4-5 “problem areas,” an athlete or client may have. If they are tight in the hips or lower body, they will have 4-5 go-to stretches they will utilize before we begin our actual warm-up. In terms of post-training stretching, I am a firm believer that a full body (1-2 different stretches per area) routine can have a multitude of benefits for whatever your goals may be. 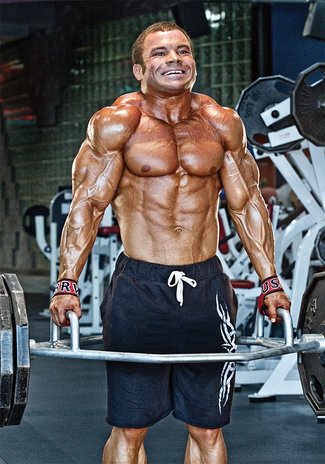 Hello everyone! Welcome to article number thirty-two (thirty-freakin’-two!) in the Challenger Strength Blog Series. Yes, I am just as shocked as you are that my initial blogging effort has transformed into such a consistent and weekly publication. Anyway, the reason I bring this up is because as the weeks go by it is increasingly hard to find unique and fresh topics to write about. However, my creativity has prevailed thus far so have no fear. What I will say though is if you have any topics you would like to see covered please drop a comment on our website, Instagram or Facebook. In addition to this, I will continue checking out various Instagram stories and find inspirations from the unfortunately stupid things I see on a day-by-day basis.
One thing I have seen a lot lately that is becoming an issue is improper shrug technique and ideology. Basically, many people have the wrong idea of what they should be doing when they shrug. They treat a barbell shrug like it is an Olympic lift. Hands all chalked up, belt on nice and tight, 200 plates on each side of the bar, and then they shrug and they look like they are receiving an exorcism in one of the conjuring movies. I am here to tell you to remove your ego from the equation and learn to shrug properly and effectively. Goals of Shrugging I have said this countless times before and I will say it again. IF YOUR GOAL FOR A BODY PART IS TO INCREASE MUSCLE SIZE THEN REPS AND FORM ARE KING. Now, after you imagine me screaming that at you, please stop attempting shrugs with hundreds of pounds on the bar. We are aiming for reps of 12-15 with a great emphasis on the contraction of the muscle and the time under tension (time a muscle is contracted for each repetition and set). Shrugging insane amounts of weight and jumping while you barely move your shoulders accomplishes nothing. No one cares that you can hold a bar with 495 pounds on it and that it sounds really loud when you throw it down after a set. Your traps will continue to stay the same size and the only thing that will receive growth is your ego! In my entire lifting life (unless using an assisted machine at the gym) I have never loaded more than 275 pounds on a barbell when I shrug. It is extremely pointless. Shrugging Form This section will be short as I only have one comment. Basically, once you have the weight adjusted properly your last focus should be form. I see countless people circularly shrug their shoulders. That is, they internally rotate, roll them back around and then repeat the motion. I mentioned time under tension previously and you can give it a try for yourself. You have no tension placed on your traps when you are rotated internally or when you roll back around. Instead, take your shoulders to your ears, pause and then return straight back down. This is a huge mistake that is so commonly made and adversely effects gains to the traps. 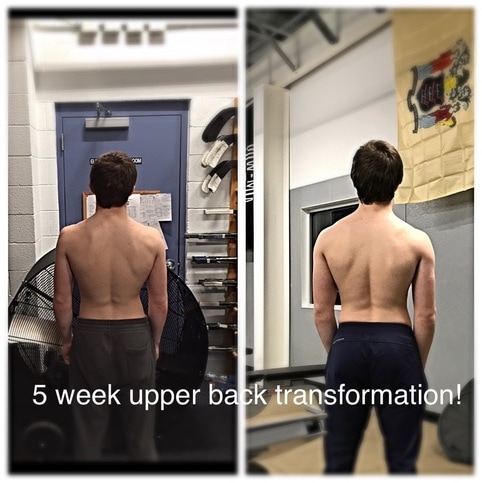 Last week I talked about some general tips to use in order to grow a strong and big upper back. I also gave you some of my favorite exercises for the upper back and how to develop it. This got me to thinking and I realized that not many people know how much of a role the upper back plays in pressing movements (Bench press, military press etc.). Many people neglect the involvement of the scapulae (shoulder blades) in their chest workouts and pressing exercises, and fail to see how much they can develop this aspect of their body if they simply focused on a few key details. This would provide a multitude of benefits for athletes as their upper back plays a huge role in their health and performance. For rotational athletes (hockey, lacrosse, baseball), the upper back plays a huge roll in not only their swing or shot (think lacrosse and hockey), but it can also limit shoulder injuries if trained effectively. A strong upper back can help improve posture and limit the internal rotation of the shoulder (internal rotation can lead to labrum injuries due to the compression and force constantly placed on the acromioclavicular (AC) joint). So not only can we contribute to an aesthetically pleasing upper back by making some adjustments in our pressing, but we can also limit injury and contribute to increases in performance for athletes! So, here is a quick breakdown of how to promote external rotation and my favorite exercise variations to do so!
External Rotation In my opinion the best analogy to use to explain external rotation of the shoulders would be to have someone imagine that their arms are outstretched and fully extended with their hands on a wall. On that wall is a big sheet of paper, and your goal is to tear the paper down the middle without moving your hands. How exactly do we do that? Well, think as if you are trying to “screw” your hands into the wall, only without moving your hands outwards. External rotation is created when we drive our right hand clockwise and our left hand counterclockwise. If we do this without actually moving our hands then we create torque, and that imaginary paper is now torn! The shoulder is a ball and socket joint, meaning that the humeral head rotates about inside the cup like socket of the shoulder blade. Now I know you are all saying “Great Gerry please explain how this applies to my training.” Well, basically many of us perform presses without external rotation, which not only leaves us susceptible to injury, but also does not allow us to develop the upper back and shoulder blades to the best of their ability. This is due to a number of factors, which include hand and grip positioning and the side effects of performing presses on a bench. Basically, when our back is on a bench the bench itself does not allow for full scapula activation and retraction, which can limit external rotation and use of the upper back. Experienced lifters know how to properly activate the upper back and can get around this, but many others struggle. Lastly, bilateral movements (presses with two hands), can negate the need to isolate each individual shoulder blade due to the fact that using both hands does not require as much stabilization as unilateral movements. With that being said, here are a few variations that makes use of these fundamental principles. Dumbbell Piston Press I have most of my rotational athletes perform presses with dumbbells due to the fact that they require more focused stabilization of the scapulae then barbell presses. However, an even better way to guarantee shoulder blade activation and external rotation is to perform dumbbell presses in a piston like manner. That is, perform each press individually (one side at a time) so that the athlete or lifter has to pay attention to activating the upper back and externally rotating at the shoulder in order to properly stabilize the weight. Barbell Push-Up The barbell push-up not only is a great tool to use in order to teach the art of pressing, but also it eliminates the use of the bench (as I mentioned), which can teach an athlete how to cue and activate the upper back. Since we are performing presses without the support of the bench we can fully retract the shoulder blades with each repetition and learn how to activate the upper back. This is a simple movement for advanced athletes, so I will usually implement slower movements, isometric holds and even increase the load (with chains) in order to progress the movement and make it more challenging. Bottoms-Up Kettle Bell Presses This last variation is the most advanced and ties in all the principles I have previously mentioned. Firstly, holding the kettle bells in a bottoms-up position makes external rotation a necessity, and is why I love this variation. If you do not properly externally rotate it is almost impossible to stabilize the kettle bell. In addition, we are once again removing the bench from the equation and requiring true activation of the upper back and retraction (pinching) of the shoulder blades. Lastly, if you really want to advance this variation and take it to the next level you can perform the presses unilaterally (one hand at a time), and tie in the same principles you would be when performing the dumbbell bench press in a piston manner! 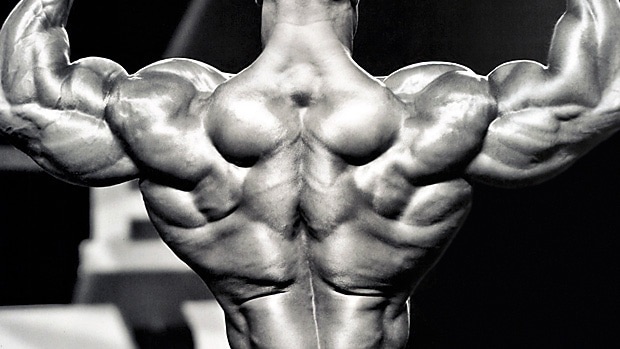 Having a muscular and strong upper back has a multitude of benefits. Strong upper backs can help avoid shoulder injuries, which often arise due to an overemphasis on pressing movements. In addition, a strong upper back will give way to performance benefits as well. For example, the scapulae, rhomboids (no this isn’t geometry) and trapezius muscles will help improve the bench press and also help maintain neutral position with the spine in the deadlift. Also, for my female followers out there if you have ever envied the woman who can rock a backless dress (going slightly out of my area of expertise here but bear with me), you’ll want to stick around and check this article out and see some tips and exercises that will help build a strong upper back!
General Tips
Favorite Exercises
 I am going to stick with the theme of cardio for this week and address something that I feel a lot of people fail to realize. We have all heard it before. The main excuse people use for why they don’t do cardio is that it is boring and monotonous. What I am about to share with you may not be ground breaking by any means, but I am still so amazed that more people do not realize it!
My quick tip for this week is to add variety to your cardio! I get it. People want structure while also experiencing new and challenging things. So, you can have a goal for the number of minutes of cardio you would like to do each session and make sure you either reach or exceed that number. Here is where my advice comes in. Don’t feel like you need to be stuck on the treadmill or bike everyday! Mix it up. I keep placing emphasis on shorter bouts of higher intensity interval training, and there are so many options to use for that type of training. As long as you are working hard for 20-30 seconds and then supplementing that with rest intervals you can do anything! Some Options
Have Fun with it! 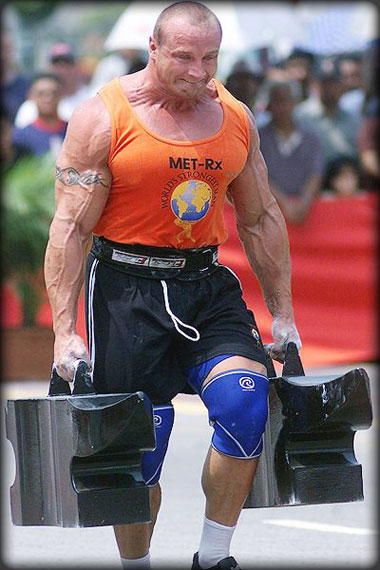 We have seen it everywhere. From gimmicky DVD’s and training systems that instruct you to pound out countless numbers of crunches, to personal trainers who break their clients back with repeated bouts of sit-ups. Have no fear. I am here to breakdown how our core actually works and how you can use this information to effectively train it.
Overview Of The Core Let's break it down this way. The deep/local stabilizers or breathing muscles (pelvic floor, diaphragm, transverse abdominis and multifidis) are not only involved in deep, 360 degree and proper breathing, but also are responsible for bracing and stabilizing the spine. The global stabilizers (obliques, add/abductors etc) resist rotation under loads and the global movers (lats, glutes, etc.) are specifically for joint movement while bracing the spine. With that being said, we know that we can essentially target the core with simple bracing exercises and then progress to more advanced exercises in which the core braces and stabilizes the spine while the extremities are in motion. Instead of continuously flexing and extending your spine (and adding undue stress to it I might add) and performing hundreds and hundreds of mind numbing crunches, look to find exercises that call on a proper bracing of the spine under minimal loads of tension and then also implement variations where your joints are in motion. After all, the true function of the core is to provide stabilization while your extremities are in motion so why not train it in that manner! Two Simple Bracing Exercises As I said, exercises that require true bracing of the deep breathing muscles can go a long way in developing a powerful and strong core. Abdominal rollouts and planks are some basic examples, but here are two of my favorite variations for understanding and developing proper bracing and spine stabilization. RKC Plank Essentially, this is a more advanced plank where you simply alternate between bouts of high tension (this is where you literally squeeze and activate every muscle group in your body while holding the plank) and regular planks. Try and perform a minute where you alternate every five seconds. Plank Pot Stirs Place your elbows on a physio ball and get into a regular plank position. Brace your spine while stirring your arms clockwise and counter clockwise. I usually perform 15 in each direction for every set. My Favorite Advanced Bracing Exercise The loaded carry, or farmer’s walk, is one of my favorites and most used core exercises in both my programming and the programming I draw up for my athletes. Essentially, you walk with heavy loads in each hand and this is the bracing while your extremities are moving that I have been talking about. This also really works on your grip and forearm strength. It is truly one of the best ways to develop a strong and powerful core!  The busier I get, the more I think about ways to improve my training economy and efficiency. If we think about the actual definition of efficiency, that is, receiving the most output from the most minimal input, we can arrive to one conclusion. We must find ways to maximize our training and utilize methods that take up less time and produce more results! This is especially true when trying to use cardio as a means of fat burning. So, today I will show all of you how to capitalize on simple heart rate calculations and higher intensity interval training (with both standard cardio and actual weight lifting). Yes, I know thinking about using weight training as a primary means of fat burning is a crazy idea, but just hear me out on this one. Not only will this save you time and improve your training efficiency, but it will also help you build muscle and lose fat simultaneously (which is what we all want)! So, Here is a guide on efficient fat burning and muscle saving cardio!
Calculating Your Ideal Fat Burning Range Here is step one, and something that is easy for anyone to calculate and apply. Basically, we all have a certain heart rate range that is ideal for fat burning. Meaning, if we keep the number of beats per minute of our heart at a certain threshold throughout our workouts we will create a fat-burning machine for not only the duration of our training, but for hours after (cardio with greater intensity and focus on elevating heart rates is proven to carry a much longer fat burning effect after completion than more slow and steady state cardio). It is quite easy to calculate your fat burning heart rate range, and you can easily track it using an apple watch or any other style of heart rate monitoring. Here are the steps for calculation: Calculate Max Heart Rate= 220-Age Find the high and low ranges of your heart rate:
Standard Fat Burning Cardio Before I get into using the above heart rates with strength training, I will briefly detail some standards for “HIIT” cardio, that is, high intensity interval training. Some conventional HIIT Protocol:
Using Weight Training To Burn Fat Looking to burn fat and maintain muscle, and don’t have time to add an extra 15 minutes to your training session? The solution is simple. Use your accessory exercises in an interval fashion. For example, let’s say for sake of argument you are working out your upper body. You plan on bench pressing as your primary movement and then following that up with a workout that goes as follows:
Simply perform rounds of these exercises in succession in a circuit manner. Keep your heart rate in the range you calculated and only take a rest once it goes above your upper threshold. The beauty of this is that you can keep your hypertrophy (muscle building) sets and repetitions and still burn fat. Not only that, but you are consolidating your time and improving your training economy!  Since I started my blog and then turned it into a newsletter I have continuously put out content that is geared towards bettering training performance. Whether it was mobility, form and technique or properly warming up, my goal has been to help all of you with some of the more prevalent questions and issues I see arise in this industry. However, this made me think, and I quickly realized that none of this information is useful if you are not motivated to get to the gym and train in the first place. How can you utilize my favorite lower body stretches before your workout if you do not actually work out consistently? How can my advice and guidance on bench press form be of any use if you never actually get to the gym and bench press? So, this week I give you some tools that will tie all this together and help put you in a position to really utilize all the information from my past blogs. Here are my five best ways to keep yourself motivated with your training!
Plan Your Training For The Week Every Sunday I will sit down and plan my training schedule for the week. I use excel to help organize my exercises and will put my individual sessions together. In addition, I place a date next to each individual workout so I not only know what my schedule is, but it holds me accountable to complete them on the days I have planned. Doing this will keep you organized, and also give you a legitimate purpose when you head to the gym to train. Instead of deciding what you’re doing when you arrive and adding exercises at a whim when you get there, you will have a consistent plan that is mapped out beforehand and holds you accountable to finish all your exercises. Set Goals Another key to motivating yourself is to have goals that you can aspire to obtain. Think about it. How much more motivated would you be if you saw yourself slowly creeping towards a goal you have been working at achieving? These goals are even easier to track when we consistently follow my first tip and plan for our training every week. With that being said, here are my four recommendations when it comes to goal setting. The goals must be:
A friend or training partner will help keep you in check and make sure you do not skip sessions or coast while you train. You would be amazed at how much someone else can push you and bring out your competitive nature. Develop Routines For beginners, having a routine is crucial. Those of us who are very into training can find the motivation to train anytime of day, but it is not always this simple. Having a set time each day (whether morning or night) when you know you will train everyday can help you develop habits that will eventually transform into lifestyle changes. Keep Your Diet In Line Your training and your diet will go hand in hand and feed off one another. If you eat poorly you will feel sluggish, not achieve your body composition goals and thus lose motivation to train. Think about it this way. These all tie together to lead to achieving your goals, and goals are the main cog in the machine that is motivation.  Last week I touched on my favorite warm-up routine for the bench press. One of the most common questions I get is related to static stretching, its role in warming up prior to a training session or athletic event and basically how to “properly” warm up. I place properly in quotations because many people are disillusioned when it comes to performing a sound and ideal warm-up. In light of this, I wanted to spend this week discussing the best way to structure and progress through your warm-ups. This template is beneficial for athletes, washed up gym goers, and anyone in between.
As a preface to the remainder of this article I would like to give a brief outline of how a warm-up should progress. Generally, I would advise for a full body foam roll prior to the beginning of every warm-up. Foam rolling can help work out and specific problem areas throughout the body. From here, I usually breakdown my warm-ups as follows:
Static Stretching/Mobility Work For Desired Areas Plain and simple, this is the area of the warm-up where I like to either work on certain problem areas where there are mobility restrictions present, or simply target the muscles that will be used extensively during the training session. For example, if I have a group of athletes they will each have their own static stretches that target areas they specifically need work on. Otherwise, if you were to be working the lower body, for example, you could target your hamstrings, hip flexors, external rotators, quadriceps and ankles. The same can be said for the days where the upper body is your focus for your training. Core Activation As I have mentioned many times before, the core plays an extensive role in bracing the spine while your extremities are in motion. So, activating your core is extremely important if you desire to have an effective workout. Exercises such as planks, farmer’s walks variations and pallof presses are great to ignite your core and prepare it to support you throughout many different ranges of motion. General Activation (Hips, Shoulders, Glutes etc.) Essentially, stability is the ability to maintain mobility throughout an entire range of motion. Activation exercises not only help to work on this, but they also help us progress from the static stretches we have just done to begin our warm-up. I always tell my athletes that static stretching is okay to do prior to training or games as long as you properly activate after. So, exercises that require mobility through ranges of motion for your hips, shoulders, and glutes are a great place to start. Rehearsal of Movement Patterns Basically, this is where we perform a basic movement that corresponds to the primary movement we are training that day. Is your session centered on the bench press? Great, perform a set of pushups to rehearse a pressing variation. Getting in some barbell squats or deadlifts? Be sure to dedicate this phase to bodyweight squats or kettle bell swings. The goal is to now use the mobility and activation we have focused on and begin to phase it into movement patterns. Central Nervous System Activation I have actually written a previous article on my favorite nervous system activation exercises, so go check that out if you need some guidance here. Basically, this is the last portion of our warm-up right before we begin our training or athletic event. Our goal is to engage the nervous system and have us firing on all cylinders before we begin our lift or game. A sprint, jump or throw are the most ideal. Hello everyone! Hope you all had a great holiday weekend. Before I get started I just want to remind all of you that if you have any questions you would like answered please just send me an email to [email protected]. This week’s question comes from Joey Mascolo from right outside Washington D.C. “Hey Ger, I was wondering if you could give me some bodyweight exercises to do for those times when you cannot get to the gym. Maybe you could share your favorite exercise for each body part. Any help at all would be extremely appreciated. Thank you!” So, this week I will give my top bodyweight exercise for each body part. Now, you can also purchase a resistance band (Rogue has a great and affordable selection), and add an additional challenge to some of these exercises. Simply adding a resistance band to your repertoire or luggage is all you need to complete some of these exercises. Go check out my favorite bodyweight exercises and remember to send your questions to [email protected] with the subject "Newsletter Q&A" Talk to you again in 2017 (Next Thursday) and have a happy and healthy New Year! Chest (Pushup) This is an easy one. The pushup is not only one of my favorite bodyweight movements, but also a staple in my programming as they are essential in developing proper pressing form. The pushup is one of the key foundational movements, and this is why it would have to be my favorite exercise. In addition, the pushup itself is incredibly versatile as an exercise. You can change your level of elevation (lift your feet up on a chair, push up off a chair etc.), change your positioning (narrow, standard or wide) and basically create a multitude of benefits for your body with just one exercise. This is a no brainer! Biceps (Banded Bicep Curls) This one is a bit harder as you will need either a band or something simple like a hand towel to complete them. Obviously, you can do banded curls and just step on the band with your foot and do a standard curl, or you can even get a hand towel if you have a partner and have them pull on the opposite end of the towel for resistance. Either is acceptable and way too cheap to not consider. Side Note: Fellas, if you’re looking to impress the ladies on the beach this summer keep a band in your travel bag. You can always catch a quick bicep pump, but just make sure no one is looking! :) Triceps (Dips) Standard dips are my definite go to here. Find a chair, and go to work. However, like I mentioned with biceps you can have a partner or friend help you use a towel and mimic overhead triceps extensions. Shoulders (Band Pull Aparts/Hip Thrusts) If you took my advice and purchased a band (just do it, they’re cheap) then band pull aparts are a must for your upper back/rear deltoids. But, just incase you didn’t, give superman’s a try. They’ll also simultaneously work your glutes. Back (Pull-Ups) Find a doorway and do some pull-ups. It’s as simple as that! Hamstrings/Glutes (Banded Stiff Leg Deadlift/Hip Thrusts) Again, use your band and do some banded Stiff Leg Deadlifts. Or, hit the floor and hammer out some hip thrusts. Make sure you get a good pinch with your glutes and you will be good to go. Quads (Bodyweight Squats) Bodyweight Squats are definitely one of my favorites. If you want to make them more quad dominant, just squat down to a chair, really sit back and load your hips, and then drive straight up from the chair, which will really call on your quads. This is important. Driving out from the chair is not only wrong, but will not target your quads in the same fashion. Calves (Calf Raises) This one is easy. Calf raises, after calf raises after calf raises. Look below to find photo explanations of some of the more intricate exercises!
 Banded Stiff Leg Deadlift (Position 3) 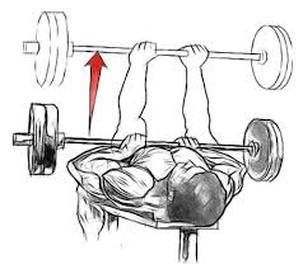 To start, let me say this. Any and all of these exercises will be the most effective when combined with proper periodization as well as nutrition. However, even with that being said, these three exercises are still my favorite to build your triceps.
Close Grip Bench Press Out of all of these, I have to say this is my favorite. I normally would suggest skull crushers as one of my favorite exercise, but I know that they can lead to elbow and wrist pain. So, I will leave that off the list and give a great alternative. Any pressing movement in general will hit your triceps, but the close grip bench press accentuates that due to the fact that a closer grip will make your triceps the primary mover and not your chest. Basically, you can load your triceps with a pretty substantial load with this movement, which is why I have found it to be extremely beneficial to my own success in building my triceps, and it has helped many others as well. Quick note on form: Do not place your hands too far together on the bar as doing so can lead to elbow and wrist pain. A great rule of thumb I like to use is placing my index finger right on the crease of the bar where the texture changes and then starting my hands there. Triceps Kickbacks and Overhead Extensions I am grouping these together since both of them completely isolate the triceps unlike the close grip bench press. Kickbacks are awesome as they literally only use your triceps to be executed. Grab a dumbbell, stagger your feet, place your arm at about a 75-90 degree angle off your hip, and then reach back with your hand until your arm is locked out. Return to complete the movement. I emphasize keeping the dumbbell off your hip because many people have a tendency to swing the dumbbell past their hip and back up, which creates momentum and takes the constant tension off the muscle. For overhead extensions, grab a dumbbell and place your hands underneath the round head. Bring the weight behind your head and then push up to full extension. Doing these seated can make the exercise much more effective as well.
Last Thursday I addressed the topic of deloading for the inaugural issue of #AskChallengerStrength. After explaining what a deload is and how to properly perform one, I also briefly discussed what to do before your first workout coming off a deload and how you can properly reactivate your Central Nervous System following a week designed to let it rest and recoup. Well, in light of that, today I will give you my three favorite Nervous System activating exercises that can not only be useful following a deload week, but can also be implemented as finishers to both your warm-up and training session. As a Certified Physical Preparation Specialist who comes from the training schooling of Joe DeFranco and Jim Smith, I will briefly explain their definition of what a CNS activating exercise entails. Basically Joe and Jim classify any jump, sprint, throw, or power intensive activity as one that will kick the CNS into high gear and properly activate it to allow for peak performance throughout your training or sporting event. So, here are my three favorite exercises!
Partner Tire Pushes This is a great tire variation that can be used for partner and group training. Basically, you stand the tire up on its side and have one person on one side and one on the other. The two then proceed to push the tire back and forth as powerfully and quickly as possible hoping that they can drive the other off balance and essentially “win” the exercise. The short bursts and power intensive nature of the exercise make it a great way to fire up the CNS and prepare an athlete for their training. Also, it is a great way to capitalize on competitive nature to increase performance! Overhead Medicine Ball Slams I like this variation of a medicine ball throw because I feel that it not only activates the CNS but it also targets the core. Activating the core is also extremely important prior to a workout. In addition to this, this type of slam requires proper bracing (which is great to practice) and also does a nice job of working on the transfer of power throughout the body. You are loading upwards and then exploding back down in the opposite direction. Box Jumps Box jumps are a great plyometric exercise to fire the CNS and also prepare for a lower body workout. There are a variety of ways to perform box jumps and they all focus on specific aspects of training. Start the exercise on your knees to make it more reactive (this is great for athletes), perform a depth jump prior to the box jump to help develop eccentric strength and acclimate the CNS to proper shock absorption, or add a weighted vest to make things even more challenging. So, in the most cut and dry way for me to explain this, these exercises or jumps, sprints and throws in particular are great to implement in a number of situations. Following a deload week they are almost mandatory to do prior to a training session. Also, they are great to use at the end of any warm up prior to either training or sports specific activity. Furthermore, you can also utilize these movements as “finishers” or the ending to your workouts and training sessions. Now, go ignite your nervous systems and reap the benefits in your training sessions! #askChallengerStrength: Why deloads are important and how to implement them into your program11/3/2016  Today’s article marks the beginning of a new era in the Challenger Strength Blog Series. From now on, Thursday’s articles will be focused on #AskChallengerStrength. Basically, you guys ask me questions and I will take one question and turn it into a blog post every Thursday. Today’s question is from Gary Wong. Gary is a power lifter and had a few questions regarding deloads and how to effectively incorporate them into a program. So, in light of this, today I will shed light on why deloading is important, how you can properly perform a deload week and alter either your weights, sets, and repetitions, and finally, when you should schedule your deload weeks.
Why The Deload is Important So, before I explain why deloading is important, I will give a brief run through on what a deload actually is. As I have mentioned time and time again, the central nervous system plays a pivotal role strength training, fitness and athletic performance. After days and weeks of repeated bouts of high intensity activity you can overwork your central nervous system immensely. An overworked nervous system can limit your performance, hamper your energy and lead to possible injury. This type of scenario is especially prevalent when lifting for relative strength and strength gains where you are pushing weights upward of 95% of your one rep max. After several weeks of activity you may begin to call on your CNS and place demands on it that it cannot handle. Here is where the deload week comes in. A deload week is crucial to include in your periodization to allow your CNS to reset, and revamp for optimal future performance. How To Properly Perform a Deload Now that you have a better understanding of why a deload week is important to begin with, I can better explain how to use certain deloading strategies. Deloading is crucial because while you are lessening your loads and performing less taxing work on your nervous system you are also not completely shutting yourself down and are still performing your scheduled workout. So, with this being said, how do you deload properly? Well, I like to think of this in two ways. One option is to drop the weight you would normally use to about roughly half and still perform the same number of sets and repetitions that are mapped out in your program. Another option is to use the same weight and cut your repetitions in half. An easy way to determine the best option is to just look at the number of repetitions and sets you are currently performing. A rule of thumb I like to use would be that if your repetitions are under six already, cut the weight in half and perform your regular repetitions. If you are performing a higher number of repetitions you can use the same weight and simply perform half of the repetitions. When To Schedule a Deload Week Scheduling a deload week can be both cut and dry, or planned based on more of a performance analysis approach. For example, if a client usually performs 135 pounds with the barbell bench press for 8 repetitions, but on the fifth week of their program they are struggling to do more than 5, it could be a good indication that their CNS is beginning to become overtaxed. So, if you had their deload planned after 6 weeks into their program and whatever type of cycle or phase you had them on, it might be a good idea to make an adjustment and have a deload week a week earlier. However, to be more cut and dry and specific, I usually recommend deload weeks after completion of a phase or cycle, which I recommend to last 3-6 weeks. Even if you are not using linear programming that has you performing specific cycles aimed at strength, hypertrophy, or even muscular endurance and you use more of a conjugate style approach where you attacking different goals every week, I still recommend that training cycles be broken into 3-6 week blocks. Lastly, after a week of deloading you will undoubtedly need to “reboot,” your CNS. So, before your first workout after a deload week perform a CNS intensive exercise prior to your weight training in order to jump-start it. This can include any variation of a jump, sprint or throw. Please check back in next Tuesday for a new article and post any questions you have and maybe next week you will be able to #AskChallengerStrength. Have a great weekend! Ultimate bench press hacks: three rest period exercises to maximize your bench press performance10/27/2016 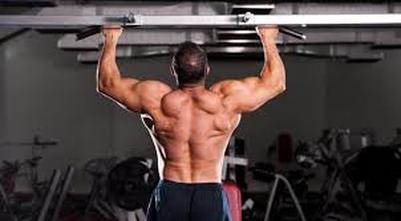 As I have mentioned previously, the lats are extremely crucial to your performance on the bench. They play a huge roll in creating power and drive and stabilizing your body throughout the duration of the range of motion. When performing sets with heavy loads your rest periods can be quite lengthy. As a result, it is imperative that you utilize these resting periods to put yourself in the best possible position to succeed during your next set. Focusing on certain areas of your back and shoulders during your time between sets can be key in helping create upper body torque via maintaining proper posture and ability to externally rotate your shoulders and activating your lats and upper back musculature. By incorporating and varying these three exercises in between your sets you will ensure that you are in the most ideal position to perform your optimal bench press. Band pull aparts, slow eccentric wide grip pull-ups, and wide grip lat pull downs will surely put you in the best possible position for your bench press.
It is truly remarkable. If you actually utilize your time between your bench press sets you can accomplish some amazing things. Much more amazing than if you stand there and scroll through your instagram feed and find pictures to like. Yes, it is shocking I know. Once again I am here to provide you with a massive revelation. Now, let’s get to those exercises. Band Pull Aparts Activating your upper back musculature, specifically in your scapular area can be extremely beneficial to your bench press. Not only does the natural motion of a band pull apart improve posture, but doing so can also activate your upper back muscles so that you will be able to properly externally rotate your shoulders. It is IMPOSSIBLE to create the necessary torque for heavy bench presses without being able to externally rotate and create torque. With that being said, posture and activation of your upper back muscles play a huge role in that. Wide Grip Pull-Ups In addition to Band Pull Aparts, Wide Grip Pull-ups with a focus on slow eccentrics do a tremendous job of not only activating your lats, but also your shoulders in an externally rotated position that is quite similar to how you grip the bar. Perform only a few reps with exceptional form. The goal here is to engage your lats, not pre exhaust them. As I have mentioned previously, your lats play a huge part in stabilizing yourself against the bench. I often cue an athlete or client to “engage and drive” their lats while bench pressing. These pull-ups will help activate them so they can properly be engaged. Wide Grip Lat Pull Downs These will provide a similar effect to the pull-ups, but are a nice alternative to those who either struggle with the pull-ups or just want a slightly easier way to activate their lats. Again, with these I advise to maintain the grip width similar to when bench pressing as it will help create muscle memory and motor control of the proper torque needed to externally rotate the shoulders in the bench press. Again, keep it light and keep the reps to a minimal. The goal of all these exercises are to engage and activate, not exhaust and create the presence of lactic acid. Now, go implement these exercises and unlock the ultimate rest period bench press hack! Understanding neuromuscular adaptation and maximizing the training effect through periodization10/25/2016 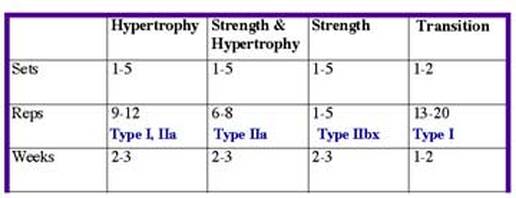 You just completed a workout and you cannot believe it. It has been three long months since you began your journey into the iron paradise. You worked your way up to five days a week at the gym and a couple protein shakes per day and you cannot believe the results you are noticing and the progress you have made. However, another month or two go by and before you know it your progress slows to a halt as you advance past your first six months in the gym. It is a harsh reality to face at first, but you are learning what every advanced lifter, athlete, and strength and conditioning coach has learned at some point. The idea of neuromuscular adaptation is simple enough to understand. Your body undergoes functional and structural changes as a result of strength training. This process is responsible for your ability to gradually handle more weight on the barbell, more minutes of cardiovascular activity, and an overall increase in volume and intensity. It is also responsible for muscle growth (the holy grail), and improvements to the central nervous system. Do not be discouraged. I am going to explain the idea of periodization, introduce methods to vary and introduce several different stimuli, and give you sample repetition ranges to deal with adaptation.
Periodization Periodization is the idea of cycling various methods of training for a specific time in order to efficiently achieve certain goals. For athletes periodization is key in ensuring that peak performance occurs during the most important time of yearly competition. For the average gym goer, periodization can more simply be thought of as an altering of several factors, but most specifically set and repetitions structures. The reason most lifters have a problem with limited gains after a certain period of time is because they do not effectively shift from one method of training to others often enough. Think of this concept as if you were buying a new pair of shoes. At first, the shoes are rugged and uncomfortable and need to be broken in. Think of that time when your training really pushes you and demands extreme amounts of energy from your body. Eventually, you settle in and break these shoes in. The shoes are ready for peak performance, and you excel. Sooner or later these shoes wear out and you no longer get the same results. This is the same as your training! You have become overly accustomed to a certain routine and as a result you have become “overly broken in,” to this training. It is time to use a new pair of shoes for a while! As I will later explain, you must alter your sets and reps, exercises, change the amount of resistance you are using, use differing bar speeds, and make changes to your rest periods and overall volume. Introducing New Stimuli Aside from adjusting your number of sets and repetitions alone, there are three main stimuli that can be altered in order to deal with adaptation. I am not going to count this as one of the three because I feel that it is obvious, but I will address it just to be safe. One of the easiest ways to deal with adaptation is to introduce new exercises into your routine. For example, if you are training strictly for the purpose of hypertrophy and aesthetics, different exercises can target musculature differently and change ranges of motion, and doing that alone can stimulate growth. Let’s say for arguments sake that you have been barbell bench-pressing on your chest days for a couple months. Switching to a dumbbell bench press can target each side of your chest individually and spark more growth. Or, you simply change the grip on your barbell bench press and this will provide the slightest tweak in your range of motion and the path of your arms through flexion and extension. Not only will this be beneficial to a lifter with bodybuilding and aesthetic aspirations, but it will also benefit a performance-oriented athlete. Teaching the body to acquire the necessary motor skills and stability and mobility with different movements is key to improving performance and more sports specific functional training methods. Being able to load your spine and maintain it in a neutral position through various ranges of motion will be critical for your continued development as an athlete. The first way you can introduce stimuli and increase the training effect would be via an increase in the load you are using. It is simple. Slowly increasing the weight you are using can alleviate the negative side effects of advancing adaptations. Basically, by increasing the load you are requesting that your body further grow and become stronger because it will need to in order to handle more weight. You can also place higher demands on your central nervous system with an increased load, which plays a key role in whether or not your body will be able to handle more volume and exertion down the line. Another way to introduce more stimuli is to alter the speed of the bar during your exercises. This can be beneficial to both bodybuilders and athletes when it comes to the training effect. Want to increase your time under tension and build muscle? Slow the bar down during the eccentric (negative) portion of the movement and doing so will increase how long a muscle is held in a contraction and it will be driven to grow. Want to develop power as an athlete? Focus on maintaining the fastest possible bar speed through the concentric portion of the lift and you will most definitely develop power. Lastly, you can adjust your rest periods and your total volume. Lifting heavier for a minimal number of repetitions? Your rest periods will undoubtedly be longer. Lifting lighter with far more repetitions? Than your recovery time will surely be far less. In terms of volume, let me first explain what volume actually is. Volume is a product of your sets, repetitions, and time under tension (think about when I discussed bar speed). Making even minuscule changes to this formula can be enough to bring about an additional training effect. Sample Repetition Ranges Here are some repetition ranges and their corresponding goals. Basically, if you want to achieve a certain goal you can match it with these rep ranges. Also, rotating through these different rep schemes every several weeks can be a great way to not only achieve different results but also deal with adaptations and ensuring that you always get the best possible training effect. Hypertrophy (muscle mass)
Strength
Relative Strength
Muscular Endurance
Now, go continue to make gains and reach your performance goals while managing the limitation of adaptations! Every day presents a new way for you to challenge yourself!  So, you just spring off the bench with a feeling of immense excitement. Today, your workout centered on the bench press. You are super excited, as you should be. For the first time since you began weight training you finally were able to fully execute a repetition with 225 pounds. This is a major milestone. Anyone who has ever lifted a weight (from the strongest power lifters and most elite athletes, to the soccer dads who relieve their work and family stress at the gym) knows the feeling of exhilaration that accompanies finally joining the 225-pound bench press club! You launch yourself off the bench feeling like you were the first man to set foot on the moon, except you just placed your flag on planet bench press. Do not let anyone fool you; what Neil Armstrong did pales in comparison to your most recent accomplishment. Your jubilation leads you to approach your freakishly strong gym partner who for the first time ever, benched 405 pounds. Basking in your achievements you both raise your arms to give each other a high-five. However, there is only one problem. You both shout in pain as you receive an excruciating sensation that shoots right to your shoulder. For the next several weeks you do not bench. Then, you get back at it, but after a few weeks the problems persist again. You continue this on and off cycle until one day you wake up at age 50 and have two torn labrums, much like my poor father. Well, Dr. Brady Blaszka and I are here to help you break this vicious cycle and lead you to a safer bench press, with reduced shoulder pain.
Essentially, the main goal here is to show you how to alleviate common pains associated with overhead activities, and also cue you to perform such activities in a way that can help you avoid pain in the first place. There are several ways to do this. Firstly, we will show you how to activate your shoulder stabilizers. Targeting the musculature of your scapular region can go a long way in improving your posture and lessening the tension placed on your acromioclavicular (AC) joint, and prevent severe injuries to your labrum and rotator cuff. From there, we will give you some cues that you can pay attention to when completing overhead movements with both dumbbells and barbells. These cues include grip, hand positioning, and the pathway of your elbows throughout flexion (eccentric or negative portion of the movement) and extension (the concentric or pressing portion of the movement). Activating and Strengthening Your Shoulder Stabilizers Shoulder and neck pain are some of the most common complaints of the overhead athlete, desk jockey and weight lifter. Research has shown a correlation between the importance of scapular muscles on shoulder and neck pain, in addition to dysfunction. A stable, functionally mobile shoulder blade can help improved posture along with shoulder and neck pain. Three exercises that can active and strengthen your shoulder stabilizers along with strengthening the musculature surrounding your scapula are I's, T's and Y's. These exercises target shoulder flexion, horizontal abduction and extension. They help activate the shoulder stabilizers and are a good starting point for pain in the neck or front of the shoulder. In addition, the augmentations they provide to the strength of the muscles surrounding your scapula are key in improving posture and avoiding pain to areas such as the acromioclavicular (AC) joint. As always, be sure to consult your local physical therapist should pain worsen or persist! Proper Hand Positioning and Grip to Ensure Shoulder Health Now that you have some specific ways to alleviate and prevent pain through a variety of exercises, it is time to discuss your grip and finding the appropriate width and techniques to promote shoulder health. Firstly, the further apart your hands are the more strain is put on your shoulders. We will get to this next notion, but essentially a wide grip does not allow you keep your elbows tight to your lats, and makes it a necessity to drop your elbows below parallel to your shoulders in order to complete the full range of motion in flexion (also known as bringing the bar to your chest). While you do not want to have your grip become too close as it will turn into more of a triceps centered movement, you should seek to bring your hands in to a moderate distance. A good cue that I often use is to place your index fingers around the rings in the bar. Doing so will put you in a good position to allow your elbows to follow a proper path, but it will also allow you to generate necessary torque. Torque is the idea of grabbing the bar and rotating your right had in a clockwise direction and your left hand in a counterclockwise direction. Yes, you cannot rotate your hands and properly hold on to the bar, so a good cue to use here would be to pretend as if you are trying to “break the bar.” To do so you would need to rotate your hands in the aforementioned directions. Generating torque in such a manner will force your shoulders to externally rotate. In addition to ensuring shoulder health by preventing internal rotation, creating torque will also add power to your bench-press or overhead press. Would you look at that! I said I would help with your shoulder health and here I am providing you a way to better your actual bench-press and overhead press performance. I am just way too nice! Creating The Proper Pathway For Your Elbows One of the most common ways to put undue stress on your shoulder and neck while doing overhead or pressing movements is to improperly track your elbows throughout the duration of the range of motion. Previously I had given a much more basic explanation of how a wide grip will lead you to drop your elbows down past your shoulders in order to achieve the full and necessary range of motion. More specifically, driving your elbows out and away from your lats in the eccentric (negative) portion of the lift will almost guarantee that you will not be able to generate proper amounts of torque. As I mentioned in the previous section, not generating torque prior to the onset of the lift will leave you extremely susceptible to shoulder injuries. Think of your body as a giant circular train track. Now, in case of emergencies this big track has deviations where the train can leave the circle and take an alternate route. Based on common sense you would know that if the train takes an alternate route there must be a problem with the traditional pathway. Your body is a very smart machine that will never let you perform a movement in an unstable fashion. Basically what this means is if you do not generate torque properly your body will seek alternate ways or routes (think of the train analogy) to achieve stability. While doing so will allow you to perform movements you wouldn’t be able to otherwise, it is not efficient and will lead to problems down the road. The alternate route you take when not generating necessary torque is to internally rotate your shoulders and place immense stress on your AC joint. I will reiterate that you cannot create torque if your elbows flare out. So, your shoulders will internally rotate as a result you are heading towards major injury. Couple the cues from the previous section on how to create torque with tracking your elbows close to your lats and you will immediately be in a much safer and traditional position. Now you have some common cues to help you achieve a much safer bench press and overhead press movement, along with some simple and effective ways to deal with the pains associated with performing the movements incorrectly. Take these tips and ensure that next time you accomplish a personal best with a pressing or overhead movement you are doing so with healthy and efficient shoulder and neck musculature. Now Go lift and press some heavy weight and leave your shoulder and neck pain behind! |
AuthorSGerry DeFilippo: ISSA CPT- CPPS, AAPS. Founder/Owner: Challenger Strength. Archives
October 2020
Categories
All
|
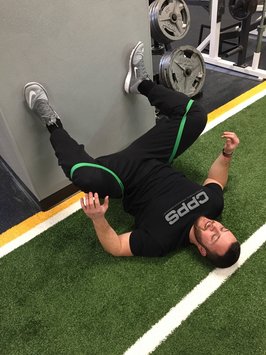
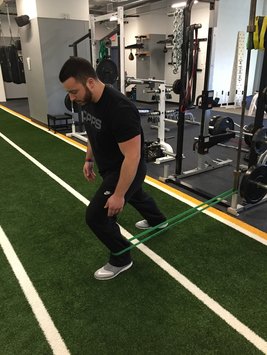
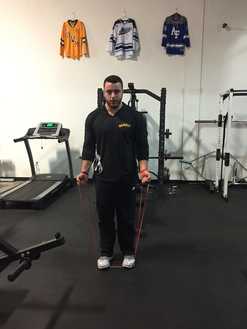
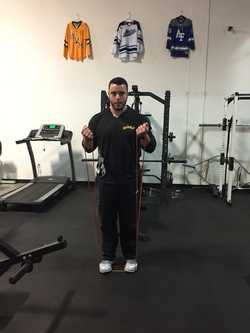
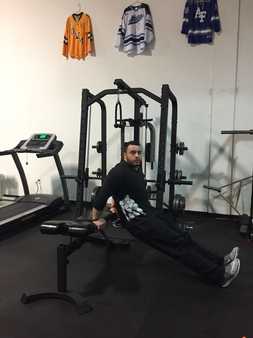
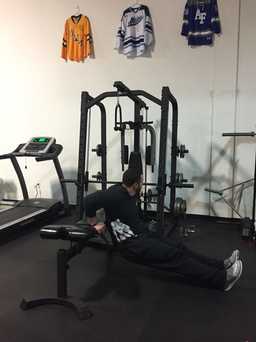
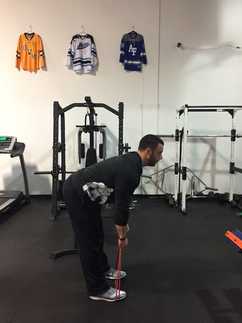
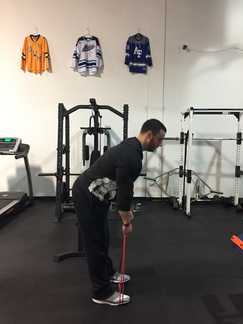
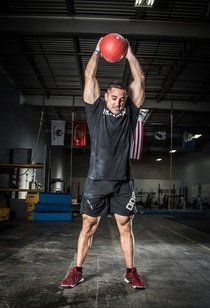
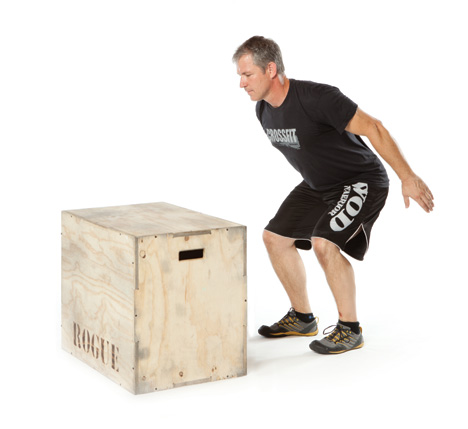
 RSS Feed